Showing posts with label Chinese Recipes. Show all posts

Chinese Spicy Beef & Tomato Soup: Recipe

Posted by Charlie @ Discovering Mandarin Monday, 2 November 2009 0 comments

Chinese Spicy Beef & Tomato Soup
Serves 4


This spicy beef and tomato soup is a very tasty wholesome meal. It is based on a rich and creamy Chinese recipe I found in a book some time ago. I served it with some prawn crackers and a nice crusty bread roll. I really love the effect of the egg nesting like clouds on top of the soup. The egg contrasts with the spicy nature of the dish.

Prep time: 10 mins
Cooking Time: 45 mins

You Will Need:

1 tsp of soy sauce
1 tbsp of rice wine
2 tbsp cornflour
pinch ground black pepper
400g beef (cut up into bite size pieces)
1 tablespoon Oil
1/2 tsp of ginger puree or grated ginger
1/2 tsp chilli flakes
4¼ cup Chicken stock
4 cloves of roughly chopped garlic
1/2 tsp of 5-spice
pinch of salt
Tin of chopped tomatos
2 Sticks of Celery

To Serve:
2 Spring Onions (Scallions)
Prawn Crackers
Crusty Bread Roll


1. Mix together the Rice wine, soy sauce, pepper and cornflour (cornstarch) in a bowl. Add the beef and turn until well coated.

2. Heat the oil in a pan. Add the beef, garlic and ginger. Stir-fry until beef becomes brown.


3. Add the stock, 5-spice, chili flakes and salt and bring to the boil. Add the tomato and celery. Cook for 25 minutes on a low heat.


4. Slowly pour in the beaten eggs (If you pour them in fast they will sink), without stirring so that they resemble clouds floating on top of the soup. Cook for a further 5 minutes.


5. Garnish with the chopped spring onion (scallion) and serve immediately.


How I Served
Chinese Spicy Beef & Tomato Soup:

With a bread roll, prawn crackers and spring onions on top.

Enjoy your Chinese-style Spicy Beef & Tomato Soup.

Sticky Lemon Chicken & Egg Fried Rice: Recipe

Posted by Charlie @ Discovering Mandarin Sunday, 4 October 2009 0 comments

Sticky Lemon Chicken & Egg Fried Rice
Serves 2


This is a simple recipe for sticky lemon chicken and egg fried rice. I served it as you might find in a restuarant. It is a tasty dish and very more-ish, both my girlfriend and I loved this recipe and will certainly be cooking this lemon chicken recipe again. The sweet honey and lemon flavour mixed with the flavour-some egg fried rice is very refreshing.

Prep time: 35 mins
Cooking Time: 25 mins

You Will Need:
2 tbsp Olive oil
2 Boneless Chicken Breasts
4 tbsp Wine Vinegar
2 tbsp dark soy sauce
3 tbsp honey
3 tbsp. brown sugar
1 tbsp. fresh ginger, minced
3 cloves Garlic (finely chopped)
3 Lemons (2 squeezed, 1 Sliced)

Sticky Lemon Chicken Marinade:
4 tbsp Cornflour
2 egg yolks
3 tbsp Water
Salt
Pepper
Thyme

For Egg Fried Rice:
1 cup. Rice
2 egg whites
2 Spring onions
handful of peas

To Serve:
1 sliced lemon
1 Spring Onion

How To Cook Sticky Lemon Chicken & Egg Fried Rice:

1. Boil rice until cooked then leave to the side to cool down. Whilst boiling the rice (about 10 minutes), separate the 2 egg yolks and whites. Combine cornstarch, water and the egg yolks in a bowl; whisk until smooth. Add chicken breasts, coating each piece well.


2. Once the rice has been cooked, place rice aside to cool ready for egg fried rice later.


3. Heat oil in a wok for frying chicken; until sizzling. Fry chicken breasts, part at a time, on both sides until brown and tender. Remove to paper towels and keep warm.


4. Add the wine vinegar, ginger, garlic to the wok and bubble until reduced by half. Add the soy sauce and honey and shake the pan to mix. Add the chicken back to the pan.


5. Pour in a splash of hot water and add the lemon slices. Let the liquid bubble and reduce down until syrupy, which will take about 10 minutes or so. By that time the chicken should be cooked through.


6. Whilst cooking the lemon chicken in the sauce. Heat some oil in another wok. Fry egg until it starts to group together. Add spring onions to the egg for a minute, and then add the rice and peas for a minute making sure to separate the rice as you put it in.


7. Add oyster sauce and soy sauce to the fried rice and fry for one minute longer. Now the chicken should be fully cooked, and (I forgot to do this, this time) add some lemon juice to make the caramalised sauce pourable. Lemon chicken and egg fried rice is now ready to serve.


As I Served it:

(Arrange Chicken breast slightly over lapping on serving dish. Place rice in a cup and flip upside down on the plate. Serve with slices of lemon and sprinkle with scallions.)

You can add the sauce over the top as mentioned above.


Spicy Chilli Sichuan Pork Balls: Recipe

Posted by Charlie @ Discovering Mandarin Friday, 25 September 2009 0 comments

Spicy Chilli - Sichuan Pork Balls w/ Noodles
Serves 4


This Chinese recipe is influence from several other recipes, and completely original and sadly not authentic Chinese. Although you will never find this anywhere else it is very tasty. It combines Sichuan Spicy Pork, with a spicier chilli garlic sauce that I used in my Firecracker Beef Recipe.

I also decided to coat the Pork in cornflour to give a nice texture, this can also be made with ground pork and not coated in cornflour if you prefer. Here is my version of Spicy Chilli -Sichuan Pork Balls.

Prep time: 30 mins
Cooking Time: 10 mins

You Will Need:
600g Diced Pork
1 tsp of soy sauce
1 Red Bell Pepper
1 Yellow Bell Pepper
2 Onions
4 Cloves of Garlic roughly chopped
1 ½ tsp of ginger puree or grated ginger
4 tbsp of chilli garlic sauce (you'll find that in an Asian Store)
2 tbsp Peanut butter
½ tsp of 5-spice
1 tablespoon Sichuan peppercorn, ground

2 Nests Medium Egg Noodles
2 tbsp Soy Sauce


To Cook:

1. Cut Pork into bite sized pieces. Add Pork to a bowl and mix with soy sauce and leave for 10-15 minutes to marinade in fridge.

2. Prepare peppers, onions, and garlic cutting to required and preferred sizes. Remember to peel and finely chop the ginger.

3. Add cornflour to the bowl of marinated pork. Covering it in a layer of corn flour so it will get crispy when fried.


4. Add 2 tbsp groundnut oil to a hot wok. Add pork for 3-4 minutes and fry until golden brown on the outside, remove pork and place in a bowl aside.

Bring a large pot of water to boil. (This will be for the noodles.) While the water is heating, go to the next step.

5. Now add onions, garlic and ginger to the wok. Fry until the onion starts to brown, and then add the pork and peppers into the wok with the onions garlic and ginger.


Fry for 1 minutes stirring vigorously. Add the chilli garlic sauce, peanut butter, Sichuan peppercorn and Chinese 5 spice.

6. Put the noodles into boiling water for 4 minutes or until cooked. Carry on stirring the wok with the spicy Sichuan pork.


7. Serve while hot. Divide noodles into individual bowls or put them all into a large bowl for sharing, pour a little soy sauce over noodles. Ladle the sauce and pork on top of noodles and top chopped peanuts.


As I Served it:
(I forgot to sprinkle the loosely cut peanuts on top)
Enjoy your Spicy Chilli Sichuan Pork Balls and noodles.

Firecracker Beef: Recipe

Posted by Charlie @ Discovering Mandarin Friday, 21 August 2009 0 comments

Firecracker Beef w/Rice Noodle Salad
Serves 4


This recipe includes double cooking Beef skirt steak. It is to be served on a tangy cold noodle salad. A great mix of flavours ranging between the cold and the hot, and the sweet and the sour, and the spicy and the salty. The cut of Beef is vital in keeping the Beef juicy and succulent when cooking twice.

Prep time: 30 mins
Cooking Time: 15 mins

You Will Need:
600g Beef Skirt

For Marinade:
1 tsp of soy sauce
2 tbsp of rice vinegar
2 tbsp of chilli garlic sauce (you'll find that in an Asian Store)
1/2 tsp of 5-spice
1/2 tsp of ginger puree or grated ginger
4 cloves of roughly chopped garlic
some black pepper to taste
1 tbsp of sesame oil


For Cold Noodle Salad:
400g Rice noodles
2 Carrots shredded
4tbsp Rice Wine Vinegar
2tbsp Fish Sauce
1tbsp Vegetable Oil
Chopped Cashew Nuts
Chopped Coriander Leaves
2 Spring Onions


1. Cut Beef skirt into four pieces. Marinade Beef adding all ingredients and mix well. Place marinade and Beef in a bag in fridge for 1 hour.


2. Cook rice noodles in boiling water for 3 minutes, rinse with cold water. Drain well to prevent a wet salad.


3. Add 2 tsp of fish sauce, which is a fermented condiment, kind of like soy sauce. We're going to add 1 tbsp of vegetable oil, we're going to add 2 tbsp of rice vinegar, shredded carrot. Mix it up and refrigerate until needed.

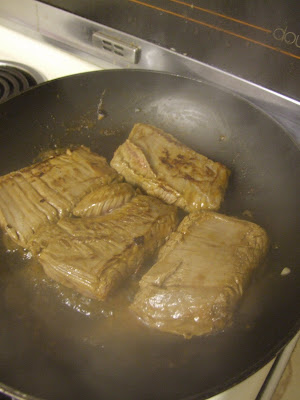
4. Take the Beef, and save the marinade. Sear Beef in a flat dry pan for 2-3 minutes on each side until caramelised. Save beef drippings with marinade for later.


5. Leave Beef to cool to room temperature. Now slice the Beef against the grain, the center will still be pink and juicy.


6. We're going to add 2 more tbsp of rice vinegar, chopped cashews, chopped coriander leaves, chopped spring onions and toss together. The salad is ready as a base for this delicious firecracker beef.

7. Preheat the pan well, sear the beef slices for just a minute or two. Caramelize the outside of the beef and the inside is still going to be really juicy and delicious.

8. Add the hot slices back to the drippings and marinade briefly.

9. Serve and top the cold tangy noodle salad with the hot, spicy firecracker beef, maybe a little sprinkle of chopped cashews


As I Serve it:


Enjoy your Firecracker Beef and Cold Rice-Noodle Salad

Chinese Hoisin Pork: Recipe

Posted by Charlie @ Discovering Mandarin Thursday, 20 August 2009 0 comments

Chinese style Hoi Sin Pork
Serves 4

This meal is pretty similiar to the Hoisin Chicken I cooked a couple of weeks ago, But I made too much sauce. I wanted to use it up, so here is the very tasty Hoisin Pork recipe.

Prep time: 25mins
Cooking Time: 15mins

You Will Need:
750g pork (preferably boneless cut)
1 tablespoon toasted sesame oil
1 tbsp soy sauce
6 tbsp hoi sin sauce
Salt and pepper
4 medium garlic cloves, smashed
12 ounces green beans, cut into 1-inch lengths
1 Bell Pepper
Thinly sliced spring onions
Toasted sesame seeds, for garnish, optional

Medium Egg Noodles


To Cook:

1. Cut up pork into bite-sized chunks. Marinade the Pork in ½ tbsp Hoisin sauce, 1tbsp soy sauce with salt and pepper. Leave in fridge for 20mins.

2. Prepare garlic, green beans, pepper and spring onions, cutting them however you like them. Boil the kettle ready for the noodles to cook in.

3. Heat the oil in the pan, until oil is hot. Fry Pork for about 5mins, then leave to the side, and leave the wok on the heat. Now quickly drop noodles into boiling water.


4. Add garlic, beans and pepper now until the garlic turns brown.


5. Add back the pork, rest of the hoi sin sauce and the spring onions. Stir fry for a minute and take out the noodles. Add soy sauce to the noodles before serving immediately.


As I Served Hoisin Pork w/Noodles


Fried Wontons: Recipe

Posted by Charlie @ Discovering Mandarin Monday, 17 August 2009 0 comments

Fried Wontons
Makes 50 Wontons


In Mandarin, Wontons are called; 馄饨 húntún "irregularly shaped dumpling" and also popularly called 云吞 yúntūn "swallowing clouds" in both Mandarin and Cantonese. However the English word actually derives from the Cantonese word 雲吞 wàntān.
Wontons are wonderfully wrapped in a silky wheat based sheet. When fried they make tasty snacks, they can be used as an appetiser, part of a meal, or as a tasty snack.

These were the wontons I had left over from the wonton soup I made last week.

Prep time: ½ hour (first time preparing wontons took longer than expected)
Cooking Time: 5 mins

You Will Need:

1 Pack of 50 Wonton Wrappers

Wonton Filling:
600g Minced Pork
2 Spring Onions
3 cloves Garlic
8g Ginger
¾ Cup of water
Seasonings for filling
1.5 tsp salt
1 tsp sugar
1 tbsp cornstarch
1 tsp pepper
1 tbsp sesame seed oil

How To Cook:

1. Whilst the soup is simmering away chop spring onions into sections, cut up garlic and ginger small. Add the minced pork, and all the seasoning and fillings into a food processor, blend until really well mixed.


2. Now wrap the wontons:

• Place a wonton wrapper on a dry clean cutting board


• Place 1 teaspoon of filling in the center of the wrapper


• Take another piece of wonton wrapper and lay it over the filling


• Press the top wrapper gently but firmly over the filling, working out any air between filling and wonton wrapper

• Use a little water to seal the edges


3. Leave wontons aside under a damp towel, and leave in the fridge to prevent the wonton wrappers drying out.


4. Once all the wrappers are filled and completed. Warm up a wok or pan with oil until hot. Add wontons a couple at a time until golden brown.

Chinese Pork Wonton Noodle Soup: Recipe

Posted by Charlie @ Discovering Mandarin Friday, 14 August 2009 4 comments

Pork Wonton Noodle Soup
Serves 6


In Mandarin, Wontons are called; 馄饨 húntún "irregularly shaped dumpling" and also popularly called 云吞 yúntūn "swallowing clouds" in both Mandarin and Cantonese. However the English word actually derives from the Cantonese word 雲吞 wàntān.
Wontons are wonderfully wrapped in a silky wheat based sheet. This is a recipe I have heavily borrowed aspects from Phoebe over at Homemade Chinese Soups. I thank her for all the great tips for a beginner like me and the Pork wonton noodle soup tasted delicious. I ended up having plenty of Wontons to freeze for the next time.

Prep time: 1 ½ hours (first time preparing wontons took longer than expected)
Cooking Time: 2 hours (soup) 5 mins (Wontons & Noodles )

You Will Need:

1 Pack of 50 or (2 Packs) 100 Wonton Wrappers (depending on wrapping style)
4 Medium Egg Noodle Nests

Wonton Filling:
600g Minced Pork
2 Spring Onions
3 cloves Garlic
8g Ginger
¾ Cup of water
Seasonings for filling
1.5 tsp salt
1 tsp sugar
1 tbsp cornstarch
1 tsp pepper
1 tbsp sesame seed oil

Soup:
Bunch of Spring Onions
3 Carrots
2 Onions
2 Sticks of Celery
1 litre Pork Stock
1 litre Water
½ Cup of Soy Sauce
1 tsp Salt
1 tsp Black Pepper


To Cook:

1. Put the pork stock in the saucepan with the water and bring to the boil. Add soy sauce and the cut-up vegetables to the soup. Leave to simmer for 2 hours.


2. Whilst the soup is simmering away chop spring onions into sections, cut up garlic and ginger small. Add the minced pork, and all the seasoning and fillings into a food processor, blend until really well mixed.

3. Now wrap the wontons:

• Place a wonton wrapper on a dry clean cutting board

• Place 1 teaspoon of filling in the center of the wrapper

• Take another piece of wonton wrapper and lay it over the filling

• Press the top wrapper gently but firmly over the filling, working out any air between filling and wonton wrapper
• Use a little water to seal the edges


4. Leave wontons aside under a damp towel, and leave in the fridge to prevent the wonton wrappers drying out.


5. Once all the wrappers are filled and completed. You are ready to cook the noodles and wontons.

6. Bring soup to the boil for the last 5 minutes. Add noodles in a colander to the soup.

7. Add wontons to a separate saucepan with boiling water; initially the wontons sink to the bottom until they cooked, when they will float. It takes about 5 mins.


8. Add the noodles to a bowl, Pour the soup ontop and add the wontons.


Recipe Sourced from:
http://www.homemade-chinese-soups.com/wonton-soup-recipe.html

Discovering Mandarin via email

Enter your email address:

Delivered by FeedBurner

Blogumulus by Roy Tanck and Amanda FazaniInstalled by CahayaBiru.com

Popular Posts

About Me

My Photo
Charlie @ Discovering Mandarin
View my complete profile